Showing posts with label Red. Show all posts

Saturday, 8 February 2014

Scandinavian Style Quilt


It's finally finished! The red and grey sofa quilt has been machine pieced, hand quilted and edged in a stripey binding ready to snuggle up on the sofa with.  

I like machine piecing during the summer so that I can hand quilt in front of the fire during the winter. It's a very simple design of squares and rectangles edged with a figured white cotton.  


But I can't rest on my laurels because I have another quilt to finish and a new one to start for a very special person.....  


All my patchwork and quilting inspiration is on my Pinterest board HERE

Monday, 3 February 2014

Feeling Poorly - what to do?

Linen curtain remnants

I've not been very well lately so I haven't been able to get to the studio and make glass for a couple of weeks. It's boring being ill, there's only so many films I can watch and books I can read and sleeps I can sleep so I thought I'd do a bit of sewing.

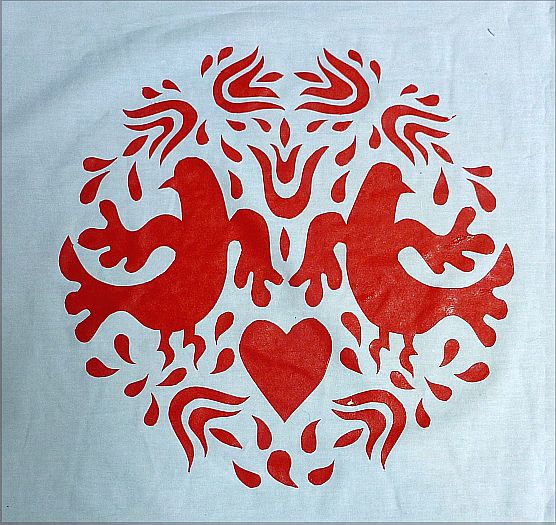
Having chopped the bottom off a pair of silver grey linen curtains I am left with a length of fabric, ideal for making some napkins.  I ironed Bondaweb to the back of a piece of red patterned cotton fabric and cut the bid shapes out, then ironed it onto the front of each napkin.  After pressing it flat I machine stitched each birdy and now have four useful (if a bit creased) napkins. 


Voila! Took an hour. Now I'm thinking: lampshades, table cloths, tea cosies......

Saturday, 20 April 2013

Silk Screen Printing

paper stencil
Today I have been showing my son, Thom, how to screen print on fabric using paper stencils.  We had a lot of fun and were thrilled with the results, although the stencil disintegrated faster than I would have liked.  Fortunately I have the original design and a quantity of photocopies so that I will be able to print it again in different colours. 

Thom spreads fabric ink onto the screen
The advantage of paper stencils is that you don't have to expose the screen and washing out is fairly simple. The disadvantage is that they can only be used for one run of prints then have to be thrown away. Also, it took me longer to cut the stencil than it did to print and clean up afterwards.

Thom pulls the squeegee whilst I hang onto the frame!
We mixed the pigment with a fabric medium to make a thick coat of colour. Permanent colour needs to be washed from the screen as soon as possible after printing has finished.   

Screen before lifting up 
Selection of prints
Cotton sheeting
We practiced on cotton sheeting first before printing onto cotton poplin. 

Cotton poplin

Our next task is to test the inks for colour fastness and then to start printing fabric squares for patchwork and quilting. 

Friday, 11 September 2009

How great is this bag?

Thom bought this super-cool bag for college from Top Man and I really love it. It's a reproduction of an original design. You can almost see the tennis rackets sticking out of it! (Squint your eyes and use your imagination).


Saturday, 5 September 2009

Somebody Buy Me These!


I'm in love with these fabulous red shoes! They are absolutely wonderful.... buy me these shoes because I want to be buried in them. They are hand made and available from Suzhou Cobblers.

Saturday, 13 December 2008

More commissions and collaborations

I recently received a request from a customer, via Etsy, to make a dish with a red gingko leaf design fused onto it.


I started with some drawings. Deep shapes cannot be cut into glass unless a Taurus saw is used as it will fracture under the stress. Of course, I don't own a Taurus saw, just a glass cutter and a grinder, so I had to plan where I could make cut lines that wouldn't make the glass leaf look "pieced" together. The final drawing was redrawn in thick black marker pen so that I could see the design clearly through the glass.

I made a prototype of the design in float glass so that I could work out any problems before I committed to the final piece. As you can see, I didn't spend enough time grinding the curved shapes on the leaf and the curves flattened out slightly when fused.

Because this is a flat design (the customer didn't want any additional texture or glass blobs) I wanted the actual red leaf to have some depth so I bought a sheet of streaky red and clear Bullseye glass from my favorite glass suppliers, Warm-Glass UK.


Streaky glass is tricky stuff. The streaks of color are random so it's hard to position the leaf design so that the best streaks are used. I only had one sheet so I couldn't afford to make any cutting mistakes. Of course, the best streaks were in the centre of the glass so I have lots of small pieces left!


I fused the leaf onto opal white and clear Bullseye glass and then slumped it into a dish mold. Fortunately the line between the leaf parts has fused closely together and has not made the deep ridge that you see in the prototype. Next, I emailed the image of the finished dish to the customer and awaited her verdict.

Success! The dish was shipped off to Germany and here is her feedback:

"The dish has safely arrived this morning. Simply great! Many thanks."

Monday, 28 April 2008

You win some, You lose some...

In a previous post, Float Glass Products, I raved about the exciting new stuff I had bought that is COE82, making it compatible with float. Whilst the colors of float glass are disappointing (compared to the vibrancy of Bullseye glass) I had high hopes that these products would help me to make new, innovative glass designs at a fraction of the cost of COE90 glass. Here's what has happened so far...


Clear bubble powder: I was hoping for large, blistering bubbles such as the ones I get in my sushi dishes but the bubbles came out more like a rash. Unperturbed, I made another tile with lots more bubble powder (see below). If you look carefully you wlil see that the larger bubbles have stress fractures in them.


Below: clear bubble powder experiments with other bubble powders.
Curious! The one of the left is clear and turquoise bubble powder. The clear powder appears to have stripped the turquoise of any color, leaving it a dirty gray. The one on the right is clear bubble powder mixed with red bubble powder. It has also stripped the red color from the bubbles. I'm blaming the clear powder but, as I am still experimenting with this, I could be wrong.


Below: bubble powder stud earrings with clear and pink bubble powder. You can see a faint sheen of pink around the bubbles. They do look unusual in the fact that the bubbles look as if the glass is under water but, as I am an "in-yer-face" with color kind of gal, I will be working on this to make it more colorful.


Transparent frit: because colored float is slightly disappointing I was expecting the frit to be a bit wishy washy. Instead, I am quite pleased with the results.
From left to right: First one is frit mixed with clear bubble powder. again, it's turned a horrible grayish color, like burnt ash.
Second one is amber, orange and red frit between two pieces of float glass. It looks quite good close up because it has tiny air bubbles trapped inside.
Third and fourth ones are both frit placed between and on top of the glass. The image doesn't show it clearly but these pieces have a lot more depth and color to them.


Below: amber, orange and red frit earrings. The transparency makes them look almost liquid. I'm quite pleased with these and they are available for sale in my Dawanda shop.


Silver and gold glass sheet: this glass has a coating of gold or silver and it has lots of pre-made scratches that make a pattern on the glass. (It would be good to be able to buy it as a solid metallic color too). Here's what I did with it.


Below: various glass nuggets fused with gold and silver coated glass. The ones on the left have been fused with a cap of clear glass. The gold and silver coating has burned out and the glass cap has devitrified. Not good! The ones on the right have been fused with the gold ands silver coated glass on top of the clear glass. Although it looks much better I didn't get the shrinkage in the kiln that I was expecting so I have since cut the glass shapes to a smaller size.


Hearts of Glass. These glass hearts have been hand cut and fused by me, Glassprimitif. They are made from float glass (coe82) with a coating of gold or silver glass. Each one measures 1.5" (3cm) and are available for sale at Glassprimitif on Etsy.

Saturday, 8 March 2008

Look what she did!


Beautiful books hand stitched and constructed by The Gift Shed using wax batik paper made by me!!! Here's Galloping Gecko (top) and a red Giddy Gecko. http://TheGiftShed.etsy.com


I am now selling batik papers in packs of three http://ILoveRed.etsy.com and don't forget that shipping is free!

Sunday, 17 February 2008

I Love Red


I have opened a new shop on Etsy called I Love Red where I am now selling lino prints, dyed and painted silk, origami, batik papers, textiles and silver jewelry. It's taking me a while to fill it but I will be listing new items every week. http://ilovered.etsy.com

Wednesday, 2 January 2008

Enamel Powder with Glass


These two dishes, Squiggly Blue and Squiggly Red, have been fused with enamel powders and glass confetti. Enamel powder (the kind you use on copper to make enamelware) is fine coloured glass that has been ground to almost a dust. It is so fine that it will fuse with most glass types and the glass co-efficiency problem doesn't arise.


After I have cut and smoothed the edges of both pieces of glass I paint squiggly lines on one piece of glass with white glue (such as Elmer's). I then shake on the enamel powder and tap off the surplus onto a sheet of clean paper. Any powder that doesn't stick to the glue can be tipped back into the container that it came from. To avoid the enamel powder falling in lumps or blobs onto the glass surface, I shake it through a fine sieve. I then take a clean, soft paint brush and brush away any residue of powder that isn't stuck to the glue.
Next, I cap the glass with another piece of clean glass and dab glue onto pieces of glass confetti. Glass confetti are very thin shards of coloured glass that you can snap into rough shapes with your fingers. Once the glue is dry (I like to leave it thirty minutes) I place the piece in the kiln and start the fusing process.
Once fully fused, the glass is then slumped in a mold to create a squiggly dish. The Squiggly Dishes are now avaiable for sale in my Etsy store at http://glassprimitif.etsy.com/

Thursday, 1 November 2007

Vote for the Colours of Dawanda!


I am taking part in the Colours of Dawanda competition on http://en.dawanda.com/glassprimitif vote for your favourite participating Pinboard and you could win a prize of you choice. Here's my Pinboard http://en.dawanda.com/list/Glassprimitif/8509-Colours-of-Dawanda
and here's the link to post your vote. http://en.dawanda.com/topic/18/10248

Saturday, 21 July 2007

Promotional Ideas


Apart from business cards there is a huge variety of promotional items and ideas to be bought on Etsy. Here is a selection of promotional goodies and the etsy shops where I bought them.
  • When I send out items from my shop I like to enclose a small note book. The original book was sent to me by http://kupokiley.etsy.com/. Kiley makes beautful handbound books and will also make books to commission .
  • But a blank notebook is not a promotional item unless it has my URL on it. So I commissioned a rubber stamp, made for me by http://onefourzero.etsy.com/. I love this stamp and stamp it onto EVERYTHING in red or pink ink.
  • The car bumper sticker was really good value for money, made for me by http://byleedesign.etsy.com/ and has my avatar and my etsy address in large letters on a red background.
  • One of my best ever purchases has been promotional buttons (badges) made by http://kittycrossbones.etsy.com/. I was lucky enough to buy these on her birthday and got 100 for the price of 50. I ordered 50 with my designs and 50 to promote the Arts Factory where I work. I also won free magnets and these look really great. Kittycrossbones also sells stickers, scratch cards and notebooks.
  • Finding pretty paper to make book covers is a pain so I was pleased to find washi paper for sale on Etsy. I bought some lovely decorative paper from http://jasminejewels.etsy.com/. check out her origami papers too.