In a previous post, Float Glass Products, I raved about the exciting new stuff I had bought that is COE82, making it compatible with float. Whilst the colors of float glass are disappointing (compared to the vibrancy of Bullseye glass) I had high hopes that these products would help me to make new, innovative glass designs at a fraction of the cost of COE90 glass. Here's what has happened so far...
Clear bubble powder: I was hoping for large, blistering bubbles such as the ones I get in my sushi dishes but the bubbles came out more like a rash. Unperturbed, I made another tile with lots more bubble powder (see below). If you look carefully you wlil see that the larger bubbles have stress fractures in them.
Below: clear bubble powder experiments with other bubble powders.
Curious! The one of the left is clear and turquoise bubble powder. The clear powder appears to have stripped the turquoise of any color, leaving it a dirty gray. The one on the right is clear bubble powder mixed with red bubble powder. It has also stripped the red color from the bubbles. I'm blaming the clear powder but, as I am still experimenting with this, I could be wrong.
Below: bubble powder stud earrings with clear and pink bubble powder. You can see a faint sheen of pink around the bubbles. They do look unusual in the fact that the bubbles look as if the glass is under water but, as I am an "in-yer-face" with color kind of gal, I will be working on this to make it more colorful.
Transparent frit: because colored float is slightly disappointing I was expecting the frit to be a bit wishy washy. Instead, I am quite pleased with the results.
From left to right: First one is frit mixed with clear bubble powder. again, it's turned a horrible grayish color, like burnt ash.
Second one is amber, orange and red frit between two pieces of float glass. It looks quite good close up because it has tiny air bubbles trapped inside.
Third and fourth ones are both frit placed between and on top of the glass. The image doesn't show it clearly but these pieces have a lot more depth and color to them.
Below: amber, orange and red frit earrings. The transparency makes them look almost liquid. I'm quite pleased with these and they are available for sale in my Dawanda shop.
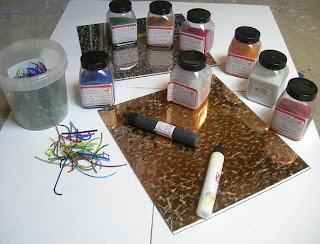
Silver and gold glass sheet: this glass has a coating of gold or silver and it has lots of pre-made scratches that make a pattern on the glass. (It would be good to be able to buy it as a solid metallic color too). Here's what I did with it.
Below: various glass nuggets fused with gold and silver coated glass. The ones on the left have been fused with a cap of clear glass. The gold and silver coating has burned out and the glass cap has devitrified. Not good! The ones on the right have been fused with the gold ands silver coated glass on top of the clear glass. Although it looks much better I didn't get the shrinkage in the kiln that I was expecting so I have since cut the glass shapes to a smaller size.
Hearts of Glass. These glass hearts have been hand cut and fused by me, Glassprimitif. They are made from float glass (coe82) with a coating of gold or silver glass. Each one measures 1.5" (3cm) and are available for sale at Glassprimitif on Etsy.
Monday, 28 April 2008
You win some, You lose some...
Labels:
amber,
bubble powder,
Bullseye,
Dawanda,
earrings,
Etsy,
float,
frit,
fused,
fusing,
Glass,
glass fusing,
Glassprimitif,
gold,
hearts,
jewelry,
orange,
Red,
silver,
Warm Glass
Friday, 25 April 2008
Wednesday, 23 April 2008
Creative Minds for Charity
Creative Minds for Charity is a collaborative project between the Creative Glass Guild of Etsy and Etsybead. Both teams have paired up to create jewelry to be sold in aid of HOST (Helping Others Street Team).
Because I have used fish shaped silver beads and twisted wire we decided to call this piece "Catch of the Day". (Well, the credit for the name actually goes to DorsetHill). This necklace measures 18" and has been carefully crafted.
Now we need your vote. If you like "Catch of the Day" and you are a member of Etsy please click HERE to vote. Soon, "Catch of the Day" will be available for sale in Host Etsy store and all monies raised will go to charity.
My team mate for this project is hot torch worker Dorsethillbeads. Dorsethill has created a beautiful set of salmon and deep red beads with a candy striped focal bead. These beads are absolutely gorgeous and have been a delight to work with.
I have used sterling silver wire and a jig to twist wire into decorative links. I have connected each link with a sterling silver jump ring and a lobster clasp. The beads have been threaded onto sterling silver wire along with amber glass beads and silver plate beads.Because I have used fish shaped silver beads and twisted wire we decided to call this piece "Catch of the Day". (Well, the credit for the name actually goes to DorsetHill). This necklace measures 18" and has been carefully crafted.
Now we need your vote. If you like "Catch of the Day" and you are a member of Etsy please click HERE to vote. Soon, "Catch of the Day" will be available for sale in Host Etsy store and all monies raised will go to charity.
Labels:
CGGE,
Etsy,
Etsybead,
Glass,
glass beads,
Glassprimitif,
HOST,
necklace
Saturday, 12 April 2008
More on Molds
Since my last post about molds I have had some feedback regarding stainless steel molds from other glass artists.
Drewjaeger says: I use stainless all the time and have never had anything crack. I just heat very slowly on the way up. And for slumping inside I don't use anything very steep. I'd say 75% of my mold collection is stainless and most of that came from thrift stores for about a dollar or less.
Nivenglassoriginals says: Regarding the stainless molds - that's what I use also. Hadn't heard about the cracking problem before - ignorance is bliss I guess - I've had no problems - touch wood. I sand the stainless really well - really well - and then apply the primer. The more you sand, the easier it is for the primer to stick. If I'm applying the primer and it is just washing off, I know I haven't sanded enough. So I sand more......
Thanks to both of you for the input. If anyone else has anything to say on molds please add a comment.
Labels:
dish,
Etsy,
fusing,
Glass,
glass fusing,
glass molds,
Glassprimitif,
mould
Wednesday, 9 April 2008
Ceramic Molds for Glass
I use ceramic molds only to slump/sag my glass into dishes as I don't trust stainless steel molds not to crack the glass. This is because the mold heats up and cools off at a different rate to the glass (coefficiency) and stainless steel can be notorious for both cracking glass and for being difficult to kiln wash too.
So here's a selection of molds (moulds) that I use. All have been bought commercially and then coated with several layers of kiln wash before use. I use a haik brush to apply each layer of kilnwash, drying with a hairdryer in between layers. After a few firings the kiln wash needs reapplying. I use a haik for two reasons - one is that I like the textured surface the glass acquires and secondly, I get mad at the spray bottle when it clogs with kiln wash!
You can see by the color of the mold shown above that it has been primed with kiln wash but not yet fired in the kiln. After the first firing it loses its pink color and becomes white. The holes are to let the heat at the base of the glass escape, avoiding cracking. I love the shape of this mold, it makes the glass look as if the corners have been turned up.
Of course, haik brushes have their own frustrations - they shed long thin hairs in the kiln wash which should be brushed off quickly before applying the next layer. When the mold is bone dry the fused glass tile is placed on top of the mold and put through a fusing cycle. Once the glass reaches the temperature of 1400F the glass should slump nicely into the mold. General advice is that the slumped glass doesn't have to go through a "resting" temperature but I am a very cautious glass artist so I rest the temperature for 30 minutes at 1000F.
Going back to glass temperatures, because ceramic and stainless steel molds shrink at different temperatures it is easier to slump glass into a mold than to sag or drape glass or a mold. This technique can sometimes result in cracking. But don't let that put you off - lots of glass artists drape glass over stainless steel molds, otherwise we wouldn't see so many beautiful handkerchief dishes and candle holders for sale.
If you do choose to use a stainless steel mold then the best way to apply the kiln wash is to heat the mold in an oven and then spray with kiln wash whilst the metal surface is still hot. Otherwise the kiln wash just runs down the steep sides and makes a puddle at the base.
Squiggly Blue Glass Dish. All glass shown here is for sale at Glassprimitif on Etsy.
Labels:
dish,
Etsy,
Glass,
glass fusing,
glass molds,
Glassprimitif,
kiln,
mould
Thursday, 3 April 2008
Spring cleaning on Flickr
So it's spring (allegedly) and I thought it was time that I gave my Flickr account some TLC. As I have exceeded my quota of images I bought myself a Pro Account and added more sets.
I also had a lesson from my pal Getglassy on how to add links (how dumb am I)? So no more typing out the full http:// stuff. So I now resolve to use Flickr more productively, follow my groups more closely and add more images too.
Subscribe to:
Posts (Atom)